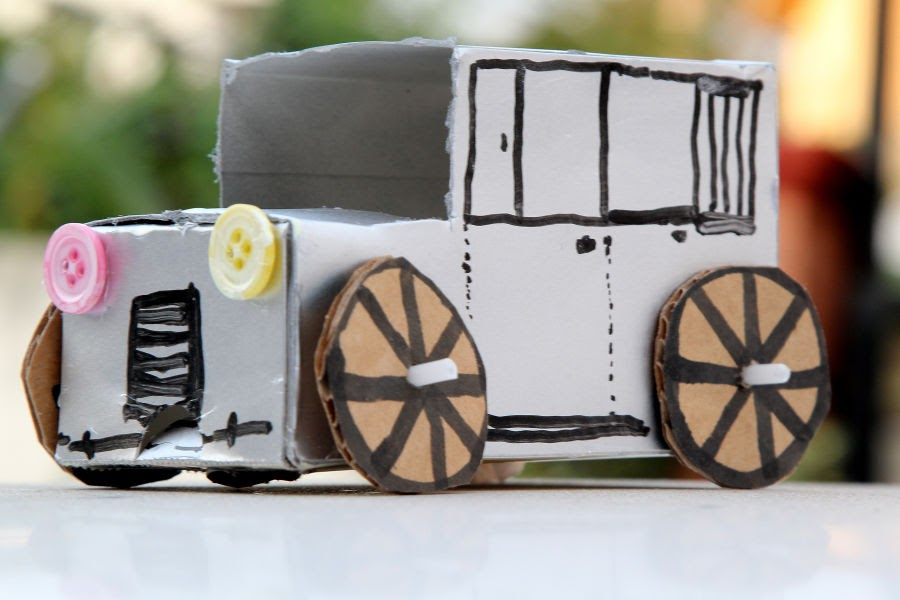
DIY CAR TUTORIAL WITH CARDBOARD: SIMPLE AND FAST
1. How To Make A Cardboard Car
Many of us have many leftover cardboard boxes, and you’ve probably wanted to know how to make a toy car out of recycled materials. This craft project will not only give your children a fantastic new car to play with but also will be a fun pastime for the whole family. Follow these steps to find out how to make the car at home using a leftover cardboard box.
- Take four paper plates and use paint and paintbrushes to make them look like wheels. Set the plates aside to dry.
- In the meantime, use strong tape to seal the open sides of the box so that the box is completely shut.
- Use a cardboard cutter to carve the hood and the car's truck.
- Attach the paper wheels using strong glue.
- With the help of markers or paints, decorate the car the way you want, adding colour, license plates, brand names, and other signs.
This is how to make a cardboard car. As you can see, this tutorial on how to build a car is pretty easy and can be done with boxes of all sizes, which means it can become the first fun DIY project for you and your little one.
2. How To Make A Cardboard Car With A Motor
Our next tutorial is a little more complex – it will teach you how to make a motor car for a school project or other purpose. Besides the cardboard and other supplies from the previous tutorial, here you will also need 4 motors, 4 batteries, 2 battery packs, and wire. Here is the guide on how to make a car with a motor and battery.
- Use scissors of a box cutter to cut out two identical rectangular frames for your future car.
- Glue your first battery pack on one of the frames and glue two motors on the opposite side from the battery pack. Make sure the motors rotate in the same way.
- Repeat step two on the other frame of the car. All four motors should rotate in the same way.
- Cut out four identical wheels from the cardboard. The wheels should be strictly the same-sized. Find the centre of each wheel and attach it to the motor. At this stage, you can further secure the wheels on the motors with rubber bands.
- Cover the first frame with the second frame, aligning the wheels and motors. Now you can decorate your new car with drawings, stickers, stencils, and anything you want!
This has been a basic tutorial on how to make a simple car with a motor. Wondering how to make a moving car that also looks like the real thing? Experiment with shapes and sizes – anything is possible when you have enough cardboard and a sharp box cutter!
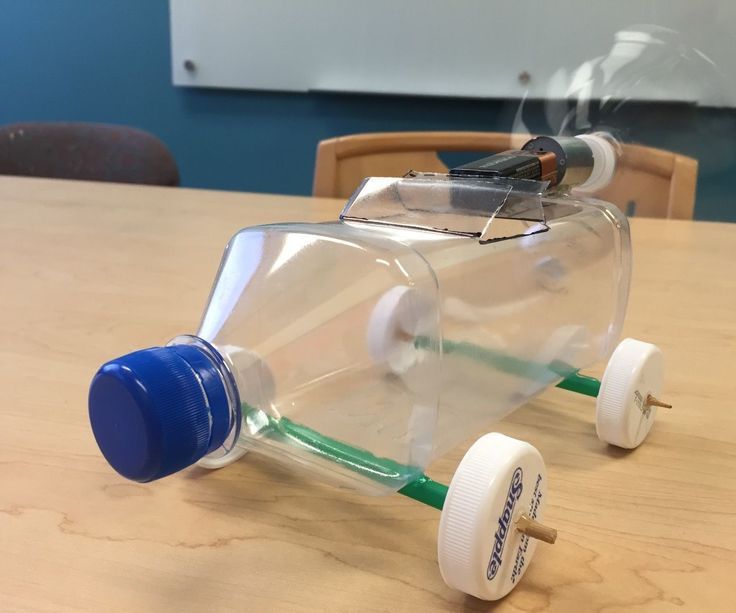
3. How To Make A Motor Car With Bottle
A moving car is always fun, but it’s even more fun when you can clearly see what’s going on inside it. That is why your whole family will benefit from learning how to make a robot car using a bottle in these simple steps:
- Take a plastic bottle and two plastic straws. Cut the straws so that each is 2 inches longer than the width of the bottle. Attach the straws to the top and bottom of the bottle with glue.
- Take four identical plastic bottle caps and drill holes in the middle of each cap. Take a thin wooden skewer, put it through the straw, and glue two caps on each side of the skewer without glueing the straw. Repeat with the other two caps.
- Take another plastic bottle, cut off the upper part along with the cap, and make 8 long cuts from the big cut towards the cap. Using a candle or matches, heat up the plastic parts and twist them slightly to make them resemble a real propeller.
- Attach the propeller to an electric motor from an old toy and glue both to the back side of the toy car.
- Take a 9V battery and simply put it close to the motor without glueing it. Now watch the cargo!
With these three easy tutorials,

you now know how to make toys that will surprise and delight your children – continue being creative together!


exactly
ReplyDeletenice craft. wish it was more simpler
ReplyDeleteNice one
ReplyDeletePlease can I make use of gum tape
ReplyDeleteyes of course, but it should be suitable for kids
DeleteWhat can supplement the button
ReplyDeleteyou can use cardboard too designed round
Delete